Refrigerator monitor
Material
Hardware
- Aduino Uno
- Hellothing L10 modem
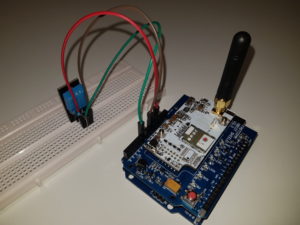
- Hellothing shield
- A magnetic door sensor (or use the L10 push button to simulate a door)
- A temperature sensor (LMT85LP)
- Buzzer (or use the shield’s onboard LED to simulate an alert signal)
Steps process
Step 1:
Assemble hardware
Wire the sensors and door sensor as below:
Connect the temperature sensor’s negative pin to the ground (GND).
Connect the temperature sensor’s positive pin to the 5V supply.
Connect the temperature sensor’s data pin to pin A0 and give it a pullup resistor of 10k to 5V.
Connect the magnetic door sensor or test button to GND.
Connect the magnetic door sensor or test button to digital pin 2. This pin is set in software to have an internal pullup resistor.
BG96_NBIoT->setAPN("internet");
BG96_NBIoT->setOperator("65501");
NB-IoT is not covered as good as 2G yet, choose whether “EDGE” or “NB-IOT” will be used for this instance and ensure that your SIM correlates to this selection. Further, define the APN and operator:
Step 2:
Customise the software
Customise the software to comply with the required details as described in code box 1
dtostrf(BG96_NBIoT->getTemp(), 6, 2, result);
sprintf(input, "%s%s%s", "{"temp":"", result, "","door":"");
dtostrf(digitalRead(BUTTON), 1, 0, result);
strcat(input, result);
strcat(input, ""}");
Next the temperature and door magnetic sensor will be measured
